A note to setting up a Kubernetes cluster.
Prerequisites
- Three VMs running Ubuntu Server 22.04
- Network connectivity between all nodes
In this guide, I’m using VMware with NAT networking. Here are my node IP addresses:
- k8s-master: 192.168.72.129
- k8s-worker1: 192.168.72.130
- k8s-worker2: 192.168.72.131
You can find your IP addresses by running
ip ain each VM.
Step 1: Preparation
Preparing the Environment
First, update all packages on each node:
sudo apt update
sudo apt upgrade -y
Reboot to apply any kernel updates:
sudo rebootSet up the hostnames for each node:
On the master node:
sudo hostnamectl set-hostname "k8s-master.quocanuit.local"On worker1:
sudo hostnamectl set-hostname "k8s-worker1.quocanuit.local"On worker2:
sudo hostnamectl set-hostname "k8s-worker2.quocanuit.local"Modifying /etc/hosts on All Nodes
Edit the hosts file on each node:
sudo nano /etc/hostsAdd the following entries:
192.168.72.129 k8s-master.quocanuit.local k8s-master
192.168.72.130 k8s-worker1.quocanuit.local k8s-worker1
192.168.72.131 k8s-worker2.quocanuit.local k8s-worker2
Disabling Swap
Kubernetes requires swap to be disabled. On all nodes:
sudo swapoff -aVerify that swap is disabled:
free -h
To make this change permanent, edit /etc/fstab:
sudo nano /etc/fstabComment out the swap line:
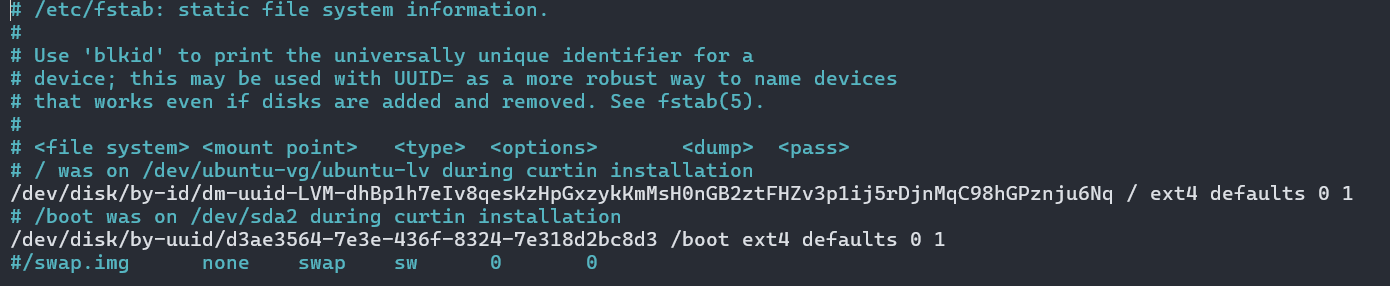
Apply the changes:
sudo mount -aConfiguring Kernel Settings
Load the necessary kernel modules:
sudo tee /etc/modules-load.d/containerd.conf <<EOF
overlay
br_netfilter
EOF
Activate the modules:
sudo modprobe overlay
sudo modprobe br_netfilter
Set kernel parameters for Kubernetes:
sudo tee /etc/sysctl.d/kubernetes.conf <<EOF
net.bridge.bridge-nf-call-ip6tables = 1
net.bridge.bridge-nf-call-iptables = 1
net.ipv4.ip_forward = 1
EOF
Apply the changes:
sudo sysctl --systemStep 2: Installing Containerd
Install containerd and its dependencies:
sudo apt install -y curl gnupg2 software-properties-common apt-transport-https ca-certificates
sudo curl -fsSL https://download.docker.com/linux/ubuntu/gpg | sudo gpg --dearmour -o /etc/apt/trusted.gpg.d/docker.gpg
sudo add-apt-repository "deb [arch=amd64] https://download.docker.com/linux/ubuntu $(lsb_release -cs) stable"
sudo apt update
sudo apt install -y containerd.io
Configure containerd:
containerd config default | sudo tee /etc/containerd/config.toml >/dev/null 2>&1
sudo sed -i 's/SystemdCgroup \= false/SystemdCgroup \= true/g' /etc/containerd/config.toml
sudo systemctl restart containerd
sudo systemctl enable containerd
Step 3: Installing Kubernetes Components
Add the Kubernetes repository:
curl -s https://packages.cloud.google.com/apt/doc/apt-key.gpg | sudo apt-key add -Add the Kubernetes repository:
echo "deb [signed-by=/etc/apt/keyrings/kubernetes-apt-keyring.gpg] https://pkgs.k8s.io/core:/stable:/v1.28/deb/ /" | sudo tee /etc/apt/sources.list.d/kubernetes.listcurl -fsSL https://pkgs.k8s.io/core:/stable:/v1.28/deb/Release.key | sudo gpg --dearmor -o /etc/apt/keyrings/kubernetes-apt-keyring.gpgInstall Kubernetes components:
sudo apt update
sudo apt install -y kubelet kubeadm kubectl
sudo apt-mark hold kubelet kubeadm kubectl
Step 4: Initializing the Cluster
On the master node only:
sudo kubeadm init \
  --pod-network-cidr=10.10.0.0/16 \
  --control-plane-endpoint=k8s-master.quocanuit.local
After initialization, set up kubectl:
mkdir -p $HOME/.kube
sudo cp -i /etc/kubernetes/admin.conf $HOME/.kube/config
sudo chown $(id -u):$(id -g) $HOME/.kube/config
Verify the cluster status:
kubectl cluster-info
kubectl get nodes
Joining Worker Nodes
On worker nodes, use the join command output from the master’s initialization. If needed, regenerate the join command on the master:
kubeadm token create --print-join-commandStep 5: Installing Calico Network Plugin
On the master node, download and install Calico:
curl https://raw.githubusercontent.com/projectcalico/calico/v3.25.0/manifests/calico.yaml -OModify the CIDR in the Calico config:
sudo nano calico.yamlUpdate the CALICO_IPV4POOL_CIDR to match your pod network CIDR:

Apply the configuration:
kubectl apply -f calico.yamlVerify the installation:
kubectl get pods -n kube-system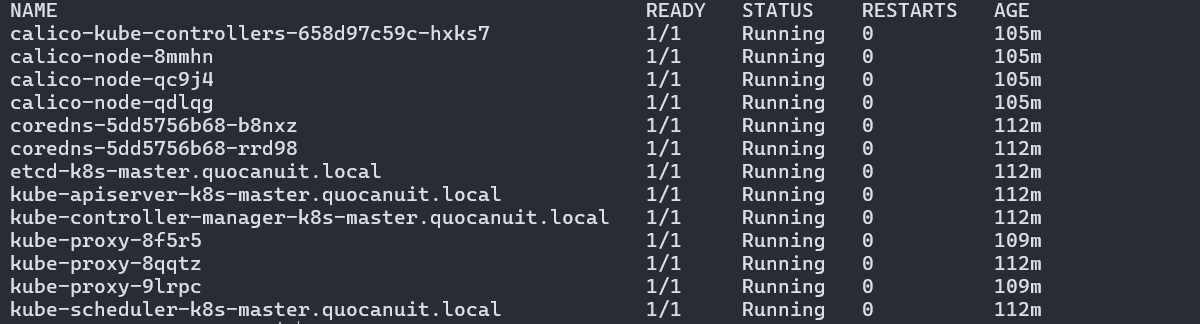
Check node status:
kubectl get nodes
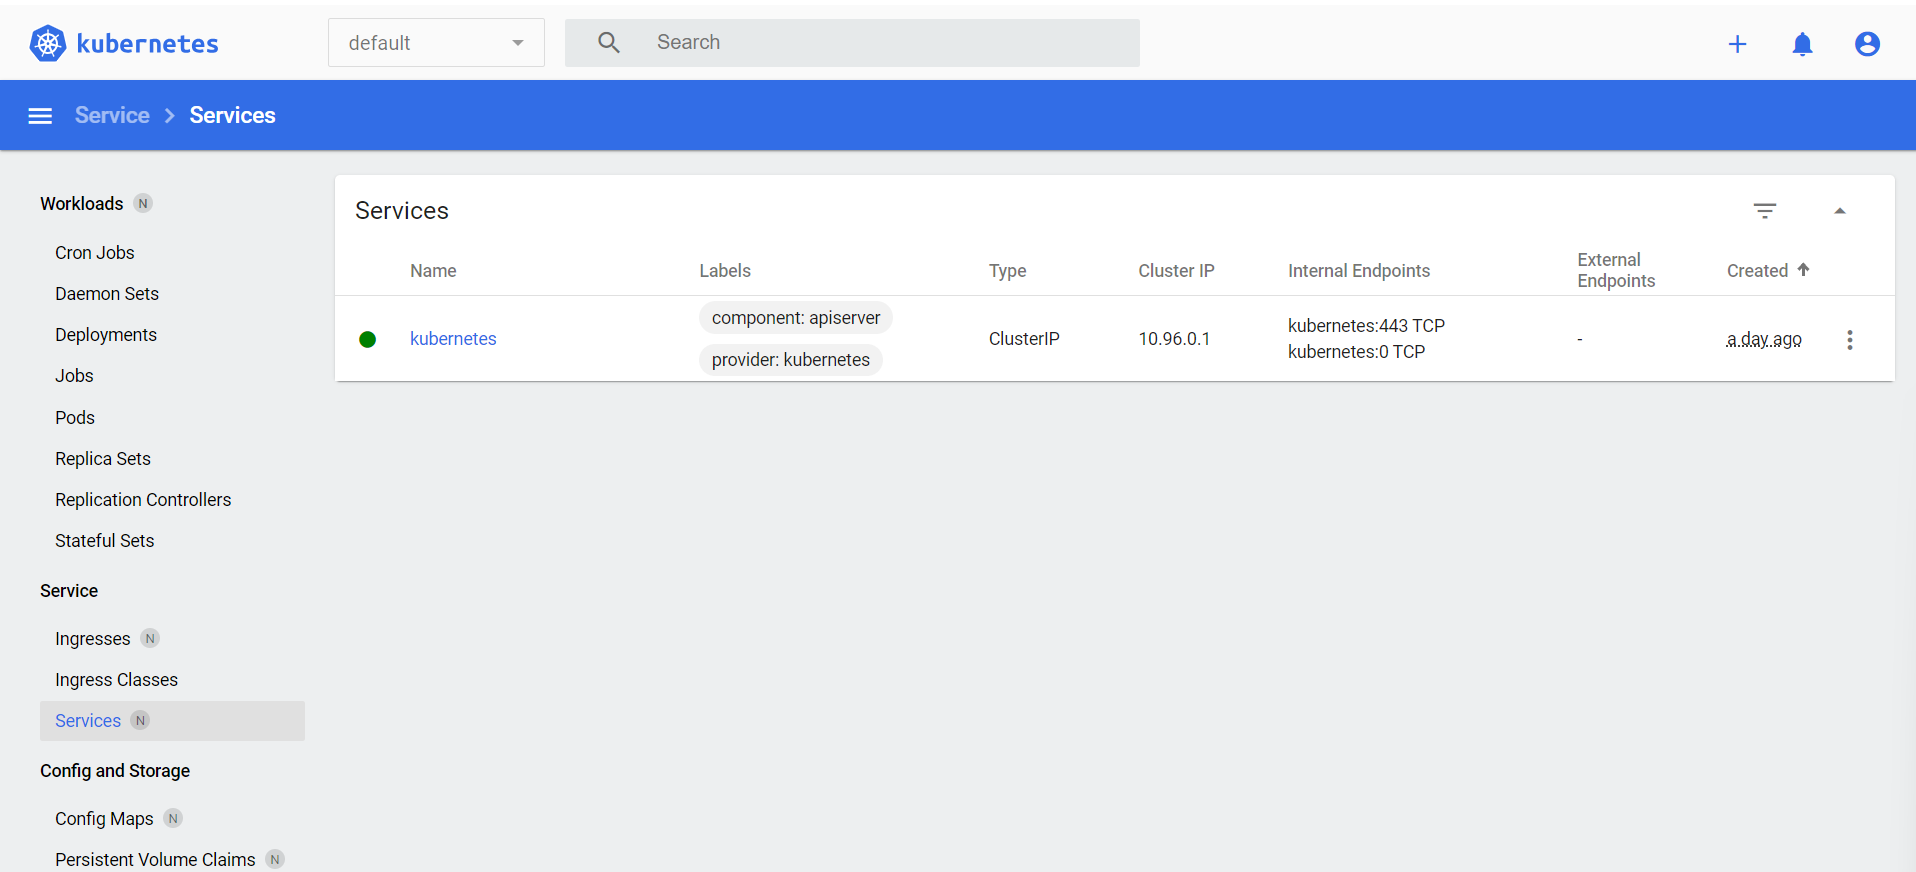
Step 6 (Optional): Installing Kubernetes Dashboard
For better cluster management, install the Kubernetes Dashboard:
kubectl apply -f https://raw.githubusercontent.com/kubernetes/dashboard/v2.7.0/aio/deploy/recommended.yamlCreate a file named kubernetes-dashboard-service-np.yaml:
---
apiVersion: v1
kind: ServiceAccount
metadata:
  name: admin-user
  namespace: kubernetes-dashboard
---
apiVersion: rbac.authorization.k8s.io/v1
kind: ClusterRoleBinding
metadata:
  name: admin-user
roleRef:
  apiGroup: rbac.authorization.k8s.io
  kind: ClusterRole
  name: cluster-admin
subjects:
  - kind: ServiceAccount
    name: admin-user
    namespace: kubernetes-dashboard
---
kind: Service
apiVersion: v1
metadata:
  namespace: kubernetes-dashboard
  name: kubernetes-dashboard-service-np
  labels:
    k8s-app: kubernetes-dashboard
spec:
  type: NodePort
  ports:
    - port: 8443
      nodePort: 30002
      targetPort: 8443
      protocol: TCP
  selector:
    k8s-app: kubernetes-dashboard
Apply the configuration:
kubectl apply -f kubernetes-dashboard-service-np.yamlGenerate an authentication token:
kubectl -n kubernetes-dashboard create token admin-userAccess the dashboard at https://192.168.72.129:30002 and enter the token.
If you can’t access the dashboard, verify your IP and port settings. You might need to set up SSH tunneling for secure access.
After successful login, you’ll see the Kubernetes Dashboard: